How do I Put Parental Controls on Nintendo Switch?
The Nintendo Switch is a video game console chased by a number of children, but they can be easily exposed to inappropriate games without parental controls. My 7-year-old son got a Nintendo Switch as a gift but when he plays it he gets very angry and starts shouting and being rude. What should I do? That’s a typical question asked by concerned parents. So in this article, we are going to give detailed solutions on how to put parental controls on Nintendo Switch. Also, you’ll know how to set restrictions on kid’s Android with one of the best parental control apps Famikit.
- Part 1: Restrict Age-inappropriate Games on Nintendo Switch Console
- Part 2: Set Full Parental Controls with Mobile App
- Extra: The Best Android Parental Control App---FamiKit
Part 1: Restrict Age-inappropriate Games on Nintendo Switch Console
Nintendo Switch enables you to set up parental controls when you first set up it. Also you can enable it later by referring to System Settings.
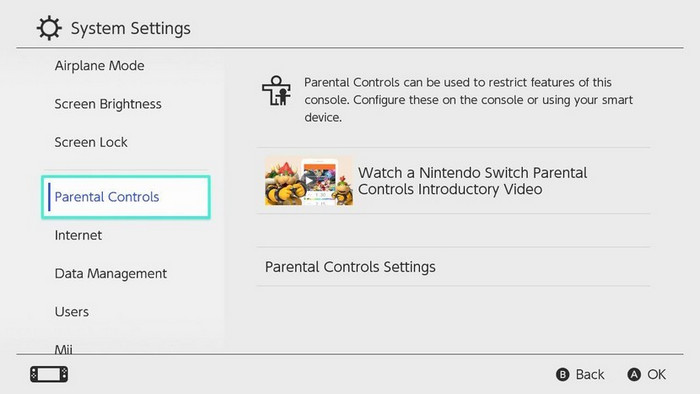
Step 1: Launch System Settings from the Home screen on your Nintendo Switch. Scroll down to select Parental Controls and then you will be prompted to close any software you are currently using.
Step 2: You will be encouraged to download and install the Nintendo Switch Parental Controls app from the App Store or Google Play. If you don't want to use the app, press X and follow the instructions to manually configure parental control settings. Otherwise, select I have the app installed. What's next? and follow the instructions for app setup.
Step 3: In this case, we choose don’t use parental control app. There will be a prompt indicating that you are only able to select Restriction Level which enables you to select Teen, Pre-teen, or Child to use a pre-made setting. After that, Nintendo will automatically filter age-appropriate content for kids.
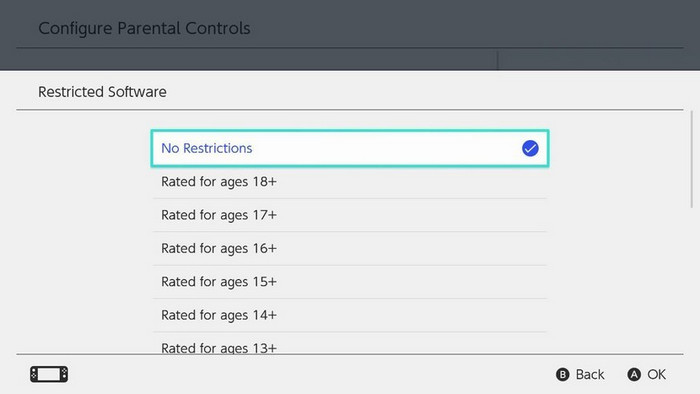
Step 4: Tap on Custom Settings >> Restricted Software which enables you to select a gaming rating starts from 3+ to 18+. (You can select your region for game rating by referring to Software Rating Organization)
Step 5: Go to Communicate with Others to set restrictions if you don’t want your kids to interact with other players.
Step 6: In the end, just set up a security PIN to complete the setup.
How to Delete Parental Controls on Nintendo Switch Console
For the deletion of parental control settings on console, just follow the steps below:
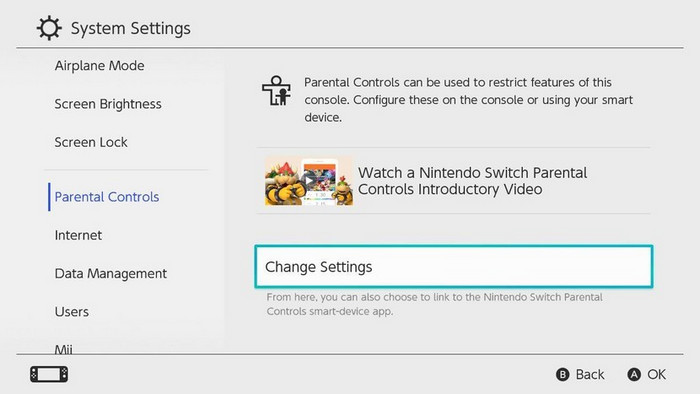
Step 1: Go to System Settings >> Parental Controls >> Change Settings.
Step 2: Enter your PIN and then tap on Delete Settings.
Part 2: Set Full Parental Controls with Mobile App
To help parents better put parental controls on kid’s Nintendo Switch, Nintendo launched a mobile app for setting game restrictions. Now you can download it either from App Store or Google Play. After the installation, you can follow the steps below to set restrictions on kid’s Nintendo Switch.
Step 1: Launch the Nintendo Switch Parental Controls app and then create or sign in your Nintendo account. Then you will be asked to enter the code on your screen.
Step 2: Back to your kid’s Nintendo Switch console, select System Settings >> Parental Controls >> Parental Controls Settings >> I have the app installed. What’s next?
Step 3: Select Enter Registration Code and then enter the six-digit registration cod appeared on your mobile device to finish the registration.
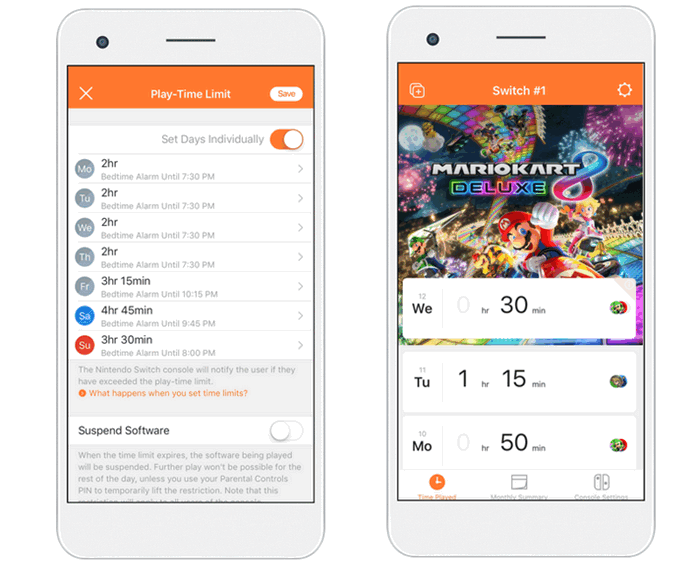
Step 4: Now you can back to your mobile device to figure out how much time your kid spent in games, decide which game your kid can play and set limits on what they can do online with the system.
How to unregister from the Nintendo Switch Parental Controls app
If you don’t want to set up parental controls with Nintendo Switch Parental Controls app, you can follow the steps below to get it done:
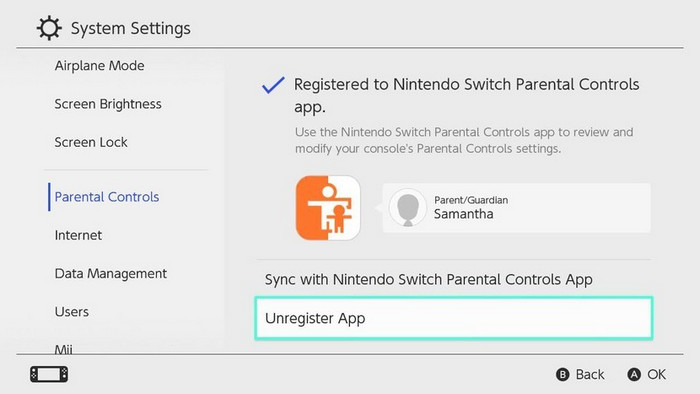
Step 1: Go to System Settings on console >> Parental Controls >> Unregister App.
Step 2: Enter PIN and then click on Unregister.
Extra: The Best Android Parental Control App---FamiKit
Parental controls is not only necessary for Nintendo Switch console, mobile restrictions are kind of urgent as kids are spending more and more time on video games with their smartphones. FamiKit is expert in screen time management, app restrictions, web filter, location tracking, geofencing and more. With this app installed on kid’s smartphone, parents can remotely put parental controls. Simply follow the steps below to get it done.
Features of FamiKit:
Step 1: Visit FamiKit console panel to register an account with valid email address.
Step 2: Then you can refer to download page to download and install the app to your kid’s Android. After the installation, sign in your account, select kid’s role and then follow the instructions given on the screen to give permissions required.
Step 3: Back to FamiKit console panel and then sign with the same account to start parental control. You can also download and install FamiKit app on your own Android to put parental controls in a flexible way.
Summary
Hopefully with this detailed guide, you can understand how to put parental controls on your kid’s Nintendo Switch. If you want to set restrictions on your kid’s Android device, you can simply try FamiKit. Well, for remotely access full phone data of your kid’s Android, you can refer to trustworthy PanSpy monitoring tool.
